Showing posts with label School Crafts. Show all posts

Friday, February 10, 2012

Dyeing Yarn with Natural Dyes

     I decided to dye the wool yarn I bought to teach Anna to knit on, because I thought it would make the process more complete for her, and also because I really wanted to try out some more natural dye stuffs.  The process of dyeing wool is a bit different than silk; mostly because you always have to be aware that the wool can felt up, and it is also very fragile when wet.


The first step is to make your yarn into long skeins.  I am assuming the reason you do this is to keep the yarn from becoming hopelessly tangled while you're dyeing it.  Anna just wound hers on the back of a chair.  A very easy way to do it.


After you take it off the chair, tie it in a few places to keep it together.  Then the next step, I did not do, but really wish I had.  You are suppose to wash the yarn in a gentle detergent in order to wash out the lanolin, and make it absorb the dye better.  I thought that this yarn, not being hand spun, had surely already been processed enough.  Apparently it still could have used a wash, since the yarn didn't seem to take the dye as well as it might, and there was a oil sheen on top of the water, as well as a strong smell of lanolin.  So, live and learn.

Presumably, after you've washed your yarn, you need to soak it in a mordant.  I just used vinegar.  I didn't measure anything, but it might be about 1 part vinegar to 6 parts water.  It has to soak for at least thirty minutes, so I went ahead and prepared my dye stuff while it was soaking. 
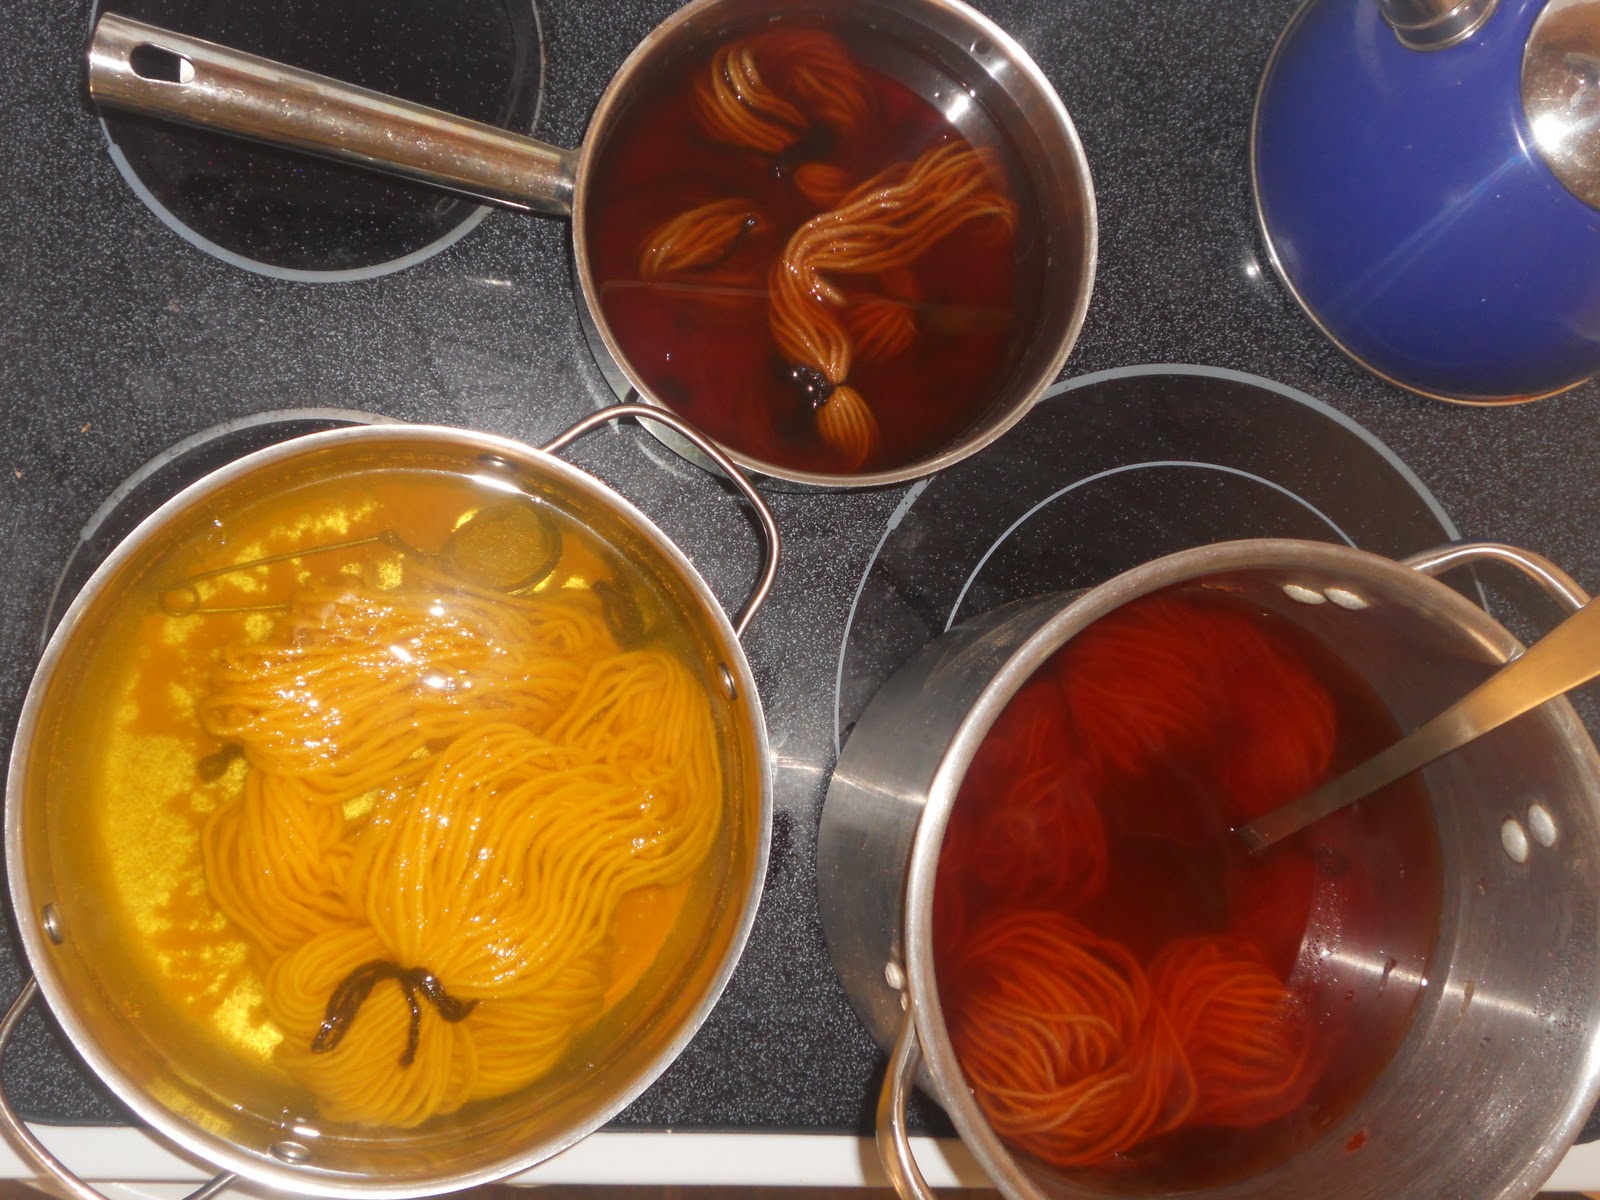
      I used onion skins, turmeric, and pine cones, but added tea to the pine cones when they didn't make the water dark enough.  The onion skins I collected over a period of time.  Whenever I cooked an onion, I would just toss the skins in a mesh bag.  Doing this, I got a lot of skins without wasting any onions.
I boiled the onion skins and the pine cones/tea until the water looked pretty dark, and then fished out the bulk of the dye stuffs, but didn't strain it.  The turmeric, I put into the pot right before I added the yarn. It didn't need to boil. After that, I just added the yarn and waited..., and waited.  The yarn really didn't seem to be absorbing the colors like it should, so I gave up getting them any darker after about four hours. 


 After rinsing, and rinsing, (the turmeric took FOREVER to rinse out) I hung them to dry.  Not as dark as I had hoped, but still very pretty.  The turmeric is crazy bright.  It does not look like it was dyed with anything natural.  It's Anna's favorite.
     All in all, a very fun project.  I can't get enough of natural dyeing.  The results are so wonderfully unpredictable.

Monday, January 30, 2012

Learning to Knit

     Anna has been begging me for years to teach her to knit, and I've been putting it off and putting it off.  I taught my self to knit as an adult, (when Anna was a toddler) and I had a really hard time getting the hang of it at first.  I'm not sure why; maybe it was partly to do with the fact that I was so comfortable crocheting, (which was learned as a child) that my hands didn't want to adjust to the new moves.  So, even though knitting is just as easy as crocheting to me now, I still had the idea that knitting was a lot harder to learn.  I taught Anna how to crochet a few months ago, and she's been making all her dolls scarves; but since she sees me knitting all the time, she kept asking, "Mama, when are you going to teach me how to knit?"  I have to admit I was intimidated at the thought. 
     I knew in Waldorf schools they teach every first grader how to knit, so I thought, OK, what's their trick?  I started researching how Waldorf schools teach children to knit, and came across this little rhyme: 
"Look in through the front door,
Go around the back,
Peek in the window,
And off jumps Jack!"
     I know this is a common little rhyme, but I had never heard it before.  After I saw it, I knew that I wasn't going to have any trouble teaching her.  I wish I had learned to knit this way! I decided to have her go through the whole experience of learning to knit, starting with making her own needles.  Ideally, we would have seen a sheep get sheared, then see the wool get spun into yarn first, but since it's winter, we will have to wait until spring to see a seep shearing.  I already have a farm that we can visit lined up.    She has seen someone spin a couple of times, and I thought that would do. 
     For the needles, I got a 1/4 in. dowel, fine sand paper, and some little caps for the ends.  I cut the dowel into ten in. lengths, then Anna got to work.
     First she sharpened them on our pencil sharpener, just like you would a pencil.  Our pencil sharpener does a very gradual tapering off, which I find a little annoying with pencils, but worked perfectly for the needles.
     Next she sanded them as smooth as smooth can be, starting with 150 grit, and ending with 600 grit, which was the finest I could find.  She also rounded off the tip so they wouldn't be sharp.
The ends were glued on by dipping the end of the dowel in the glue bottle, then putting on the caps.
     After the glue dried, they were waxed with a beeswax polish and buffed smooth.  They turned out to be a size 10.5 according to my needle sizer.  The needles were now ready to be used, and she couldn't wait to try them out. 

     She caught on so quickly I was amazed.  The rhyme broke every step down, so the she could understand what she was suppose to be doing.  So much better than me saying, "Now put your needle in here, around here, now in here", etc.  I can't get her to weave the yarn through her fingers to control tension, but she seems to get on OK without doing it. 
     I got single ply "fulled" wool yarn for her to learn on, since I figured that would be easiest, and I got cream so that we could dye it too. 
     I used turmeric, onion skins, and tea to dye it.
     Here are the skeins drying.  Didn't they turn out pretty?  I have a wonderful book "Making Toys With Children", which has some simple knitted animal patterns.  I decided to use these for her to learn on, since in very little time you can actually have a neat finished product.  Anna has trouble finishing any project that takes longer than a couple of days to complete, but nobody wants to just make pointless little swatches.   The pattern for a chicken couldn't be easier, (It's just a square) so that is what she did first. 
Isn't that cute?  She is thrilled to have not only learned to knit today, but also have a little stuffed chicken to show for it.  I think she took the chicken to bed with her. 
     Of course, now that she has her own knitting needles and yarn, she needs a bag to keep it in, so I made her a linen drawstring bag with an "A" on it, just for her. 


Thursday, October 20, 2011

Paper Mache Motte and Bailey

     One of the history projects Anna wanted to do this year, is build a model castle.  Since we started out the year by reading about William the Conqueror, I thought that it would be fun to make a motte and bailey castle, and then do a stone keep style one later on.  Paper mache seemed to be the best way to form the "earth" mounds, and paper mache is of course very fun to work with.  I used a mixture that only contains flour, sugar, and water, since the twins would be "helping" and probably sampling it too.  Here's a link for the recipe.


     We used a paper plate as a mold for the bailey, and just wadded up news papers for the motte.  It took over a week for it to dry, probably due in part to our overly enthusiastic helpers, who were awfully heavy with the goop.
After it was finally dry, Anna painted it green, and then with much patience, glued on dozens of little sticks for the palisade. 
     Next, was to make the castle and the buildings to go inside the bailey, (which were made out of little cardboard boxes) and then FINALLY it was finished. 

     Ta Da!  The finished result!  Anna did most of the work herself, with only minimal help from me, and she is understandably very proud of it.  However... I have no idea where to put it.  This is when a school room would be really nice.

Tuesday, October 18, 2011

Medieval History

     I am really enjoying going through the history selections that Ambleside Online has for year 2.  Coordinating activities to go along with our study of the Middle Ages has been lots of fun too.  Last year Anna had trouble forming connection with what we were reading about, so this year I have been making a strong effort into doing fun "Medieval" activities as well as reading. 
      One of the things we did was celebrate Michaelmas.  We made a bread dragon, and then read Revelation 12.  Very simple; no fuss, but the kids had a blast.
     My original intention was to make a seven headed dragon, like the one in Revelation, but it ended up being a five headed dragon, as Samuel and Abriel refused to contribute their dough blobs. 
     The end result looked more like a bloated plesiosaurus than a ferocious dragon, but it tasted good!

Tuesday, May 31, 2011

Dyeing Silks

     To me, the very thought of paying twelve dollars for a play silk is insane, especially when it is so much cheaper and fun to dye your own.  I recently had my nieces over so that they could all experience the fun of dyeing their own play silks.  (Or scarves, in the case of my older nieces, who have out grown play silks) They all wanted to do tie dye as oppose to doing it all one color.  I wasn't sure at first how tie dyeing would work with cool-aid dye, but they turned out beautiful, and each one is as unique as the girl that made it.  This had to be the yummiest smelling project I ever did.  I just could not convince the girls that the unsweetened cool-aid with vinegar was not good to taste. 
     I mixed three or two packets of cool-aid in just a little bit of hot water, to try to get the darkest colors possible.  Since the scarves were only dipped, and did not soak, they were not dark, but were bright enough.
     Everyone had their own method for dipping and tying.  I was pretty sure Anna's first scarf was going to turn out mud colored, since she just kept dipping, and dipping, but it turned out a lovely burnt orange.


     As you can see, the results were varied, but all were beautiful.
     And they made great capes!

Thursday, May 26, 2011

Making Paper the Quick and Easy Way

     I discovered this way of making paper a little while back when I was teaching my co-op nature class.  I wanted the kids to make paper as an activity to go along with our wasp study, but I couldn't find any tutorials that didn't require hours of time and lot's of equipment.  That was until I discovered the tin can method.  You can turn out little circles of paper in just a few minutes, and I didn't have to buy or make any special equipment.  We had so much fun making this in class, that I decided to incorporate it into Anna's tree lapbook. 


All you need is :
1. Two tin cans, (or a tin can and a yogurt container, as is the case here) with one of the cans having it's bottom cut out.
2. A blender.
3. Window screen.
4. An embroidery hoop.
5. Several rags or hand towels
6. Scrap paper
It was actually all those little bits of paper left over from cutting out the mini books, that gave me the idea of making paper for her lapbook.
     After you have all your supplies, start ripping up the paper into little bits, and then let them soak for a few minutes.  Dump the water and the paper into the blender, and blend until it looks like sludge.  Set your embroidery hoop with the screen in it, on top of the yogurt container, and then put your bottomless can on top of that.  Lift up the can when the water has mostly drained out, and it looks gelatinous.
Press the water out with a rag, and then remove the screen.  If the paper wants to stick to the screen, just press some more water out. 


 Lay the paper on another rag or paper towel, and press some more.  That's it!  This project is so easy, that Anna was able to do it almost entirely by herself.  She made  a few different colors, and even experimented by putting leaves in the mix. 

Here are some of the paper circles finished, and drying in the sun.

Wednesday, November 24, 2010

An Easy Art Project

     We do art every Monday, and this includes learning about our Artist for the semester, picture study, and also working on our own creative projects.  For this Monday's art project I got the idea to do oil pastel and water color pictures from this Monet inspired project at Art Projects for Kids.
    I chose to do trees instead of lilies, and sent the kids outside while I got everything set up. I drew a tree out-line with a sharpie pen on all three of their sheets, although obviously the twins could care less.


     Anna worked on a sheet of watercolor paper, and the twins had thick drawing paper.  I had blue acrylic paint in a jar, watered down to resemble watercolor, and a selection of green, brown, orange, and red oil pastels in the middle of the table.  Samuel didn't lose any time in getting a big handful of colors to start with.
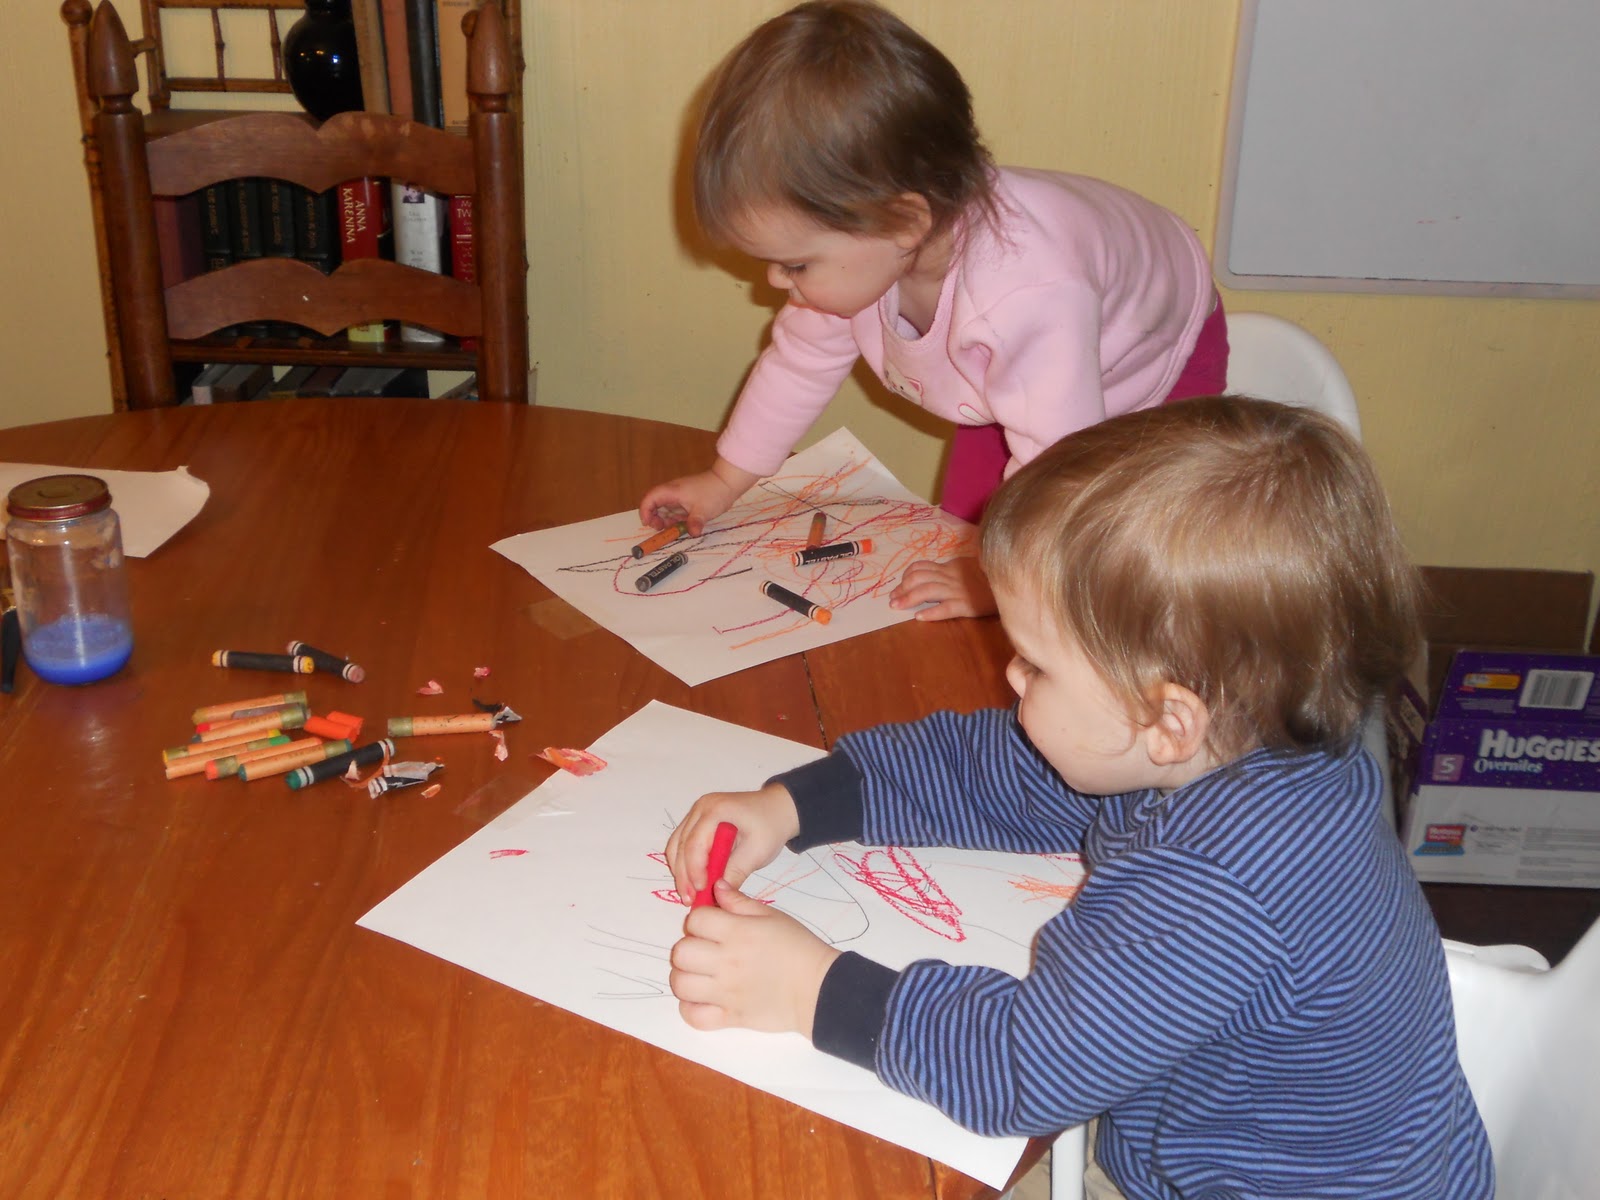


     Both Abriel and Samuel worked industriously, and only occasionally tried to eat the pastels and grab the jar of paint.


     After Anna was finished with her tree, I gave her a big wash brush, and told her to paint all over her picture.  She looked a little dubious until I explained that the oil pastels repel water, and so the paint would not stick to her drawing.  She liked the cloudy effect it gave her sky.


Then I temporally lost my sanity, and allowed Samuel and Abriel to put a wash on theirs.  (With my help)  Samuel did pretty good...


 Abriel on the other hand did not.  She refused to let me help her, and seemed very into dumping the whole jar of paint on her picture.  It ended in her screaming as I wrestled the paint brush out of her death grip; so I learned my lesson about that. 
    I hung the finished pictures on the wall, where they look very pretty.